GachaBuilds
Genshin Impact

Build Kokomi

Options d’équipement · Statistiques principales · Exemples d’équipes

Votre plan de build

Pour Kokomi, comparez 4pc Ocean-Hued Clam (OHC) en conservant la configuration HP% or Energy Recharge · Hydro DMG Bonus > HP% · Healing Bonus recommandée. Un changement d’arme ou de set se juge plus facilement si l’équipe et le timing des compétences restent identiques.

Options d’équipement

42 options

Commencez par un équipement accessible. Ce sont des alternatives, pas des pièces à équiper ensemble. Le raffinement, la taille du set et les restrictions d’équipe modifient le résultat.

Sets d’artefacts

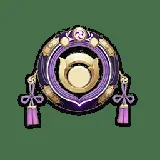
4pc Ocean-Hued Clam (OHC)
4pc Ocean-Hued Clam (OHC)On-Field Healer / Enabler
4pc Tenacity of the Millelith (TotM)
4pc Tenacity of the Millelith (TotM)On-Field Healer / Enabler
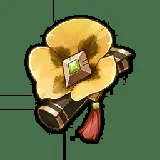
4pc Scroll of the Hero of Cinder City (Scroll)
4pc Scroll of the Hero of Cinder City (Scroll)On-Field Healer / Enabler
4pc Deepwood Memories
4pc Deepwood MemoriesOn-Field Healer / Enabler
+13 options
4pc Silken Moon’s Serenade (SMS)
4pc Silken Moon’s Serenade (SMS)On-Field Healer / Enabler
4pc Tenacity of the Millelith (TotM)
4pc Tenacity of the Millelith (TotM)Off-Field Support
4pc Scroll of the Hero of Cinder City (Scroll)
4pc Scroll of the Hero of Cinder City (Scroll)Off-Field Support
4pc Song of Days Past
4pc Song of Days PastOff-Field Support
4pc Deepwood Memories
4pc Deepwood MemoriesOff-Field Support
4pc Silken Moon’s Serenade (SMS)
4pc Silken Moon’s Serenade (SMS)Off-Field Support
4pc Instructor
4pc InstructorOff-Field Support
4pc Ocean-Hued Clam
4pc Ocean-Hued ClamOff-Field Support
4pc Flower of Paradise Lost (FoPL)
4pc Flower of Paradise Lost (FoPL)Bloom DPS
4pc Gilded Dreams (GD)
4pc Gilded Dreams (GD)Bloom DPS
4pc Deepwood Memories
4pc Deepwood MemoriesBloom DPS
4pc Ocean-Hued Clam (OHC)
4pc Ocean-Hued Clam (OHC)Bloom DPS
2pc + 2pc EM / ER / HP% / Healing BonusBloom DPS

Armes

5★ Everlasting Moonglow
5★ Everlasting MoonglowOn-Field Healer / Enabler
5★ Jadefall’s Splendor
5★ Jadefall’s SplendorOn-Field Healer / Enabler
4★ Prototype Amber
4★ Prototype AmberOn-Field Healer / Enabler
4★ Ash-Graven Drinking Horn
4★ Ash-Graven Drinking HornOn-Field Healer / Enabler
+21 options
4★ Hakushin Ring
4★ Hakushin RingOn-Field Healer / Enabler
3★ Thrilling Tales of Dragon Slayers (TTDS)
3★ Thrilling Tales of Dragon Slayers (TTDS)On-Field Healer / Enabler
4★ Favonius Codex
4★ Favonius CodexOn-Field Healer / Enabler
4★ Sacrificial Fragments
4★ Sacrificial FragmentsOn-Field Healer / Enabler
5★ A Thousand Floating Dreams
5★ A Thousand Floating DreamsOn-Field Healer / Enabler
3★ Thrilling Tales of Dragon Slayers (TTDS)
3★ Thrilling Tales of Dragon Slayers (TTDS)Off-Field Support
4★ Prototype Amber
4★ Prototype AmberOff-Field Support
4★ Hakushin Ring
4★ Hakushin RingOff-Field Support
4★ Sacrificial Fragments
4★ Sacrificial FragmentsOff-Field Support
5★ Everlasting Moonglow, Jadefall’s Splendor
5★ Everlasting Moonglow, Jadefall’s SplendorOff-Field Support
5★ A Thousand Floating Dreams
5★ A Thousand Floating DreamsOff-Field Support
4★ Ash-Graven Drinking Horn
4★ Ash-Graven Drinking HornOff-Field Support
5★ Sunny Morning Sleep-In , Starcaller’s Watch , Nightweaver’s Looking Glass , A Thousand Floating DreamsBloom DPS
4★ Blackmarrow Lantern
4★ Blackmarrow LanternBloom DPS
4★ Sacrificial Fragments
4★ Sacrificial FragmentsBloom DPS
4★ Etherlight Spindlelute
4★ Etherlight SpindleluteBloom DPS
4★ Favonius Codex
4★ Favonius CodexBloom DPS
5★ Everlasting Moonglow
5★ Everlasting MoonglowBloom DPS
4★ Prototype Amber
4★ Prototype AmberBloom DPS
4★ Fruit of Fulfillment
4★ Fruit of FulfillmentBloom DPS
3★ Magic Guide
3★ Magic GuideBloom DPS

Statistiques principales

Utilisez les statistiques par emplacement pour obtenir une configuration fonctionnelle. Si plusieurs choix sont proposés, retenez celui qui corrige le manque de votre équipe.

SandsHP% or Energy RechargeOn-Field Healer / Enabler
GobletHydro DMG Bonus > HP%On-Field Healer / Enabler
CircletHealing BonusOn-Field Healer / Enabler
SandsHP% or Energy RechargeOff-Field Support
GobletHP%Off-Field Support
CircletHealing BonusOff-Field Support
SandsEM / ER / HP%Bloom DPS
GobletEM / HP%Bloom DPS
CircletEM / Healing BonusBloom DPS

Investissement et configurations

Practice sequence

N3D

Practice sequence

N2D

Practice sequence

N2C / N3C

Exemples d’équipes

Une composition sert de point de départ : vérifiez la disponibilité des alliés et la répétition du cycle de ressources. Remplacer un personnage change aussi le timing des bonus et la protection.

GACHABUILDS

Tester votre configuration

Avant d’ajouter des dégâts, assurez le retour de la compétence importante au cycle suivant. Testez contre le même ennemi et repérez le moment où l’énergie manque.

Conservez la statistique défensive recommandée lorsque le personnage en dépend. Un remplacement offensif peut diminuer sa survie et sa contribution à cette configuration.

Choisissez une option, refaites le combat deux fois et changez une seule variable. Observez le retour de la rotation et la survie sans perdre la fenêtre de dégâts.


Vérifié · 2026-10-13

Autres personnages