Opciones de equipo · Estadísticas principales · Ejemplos de equipos
Tu plan de build
Para Rosaria, compara 4pc Gilded Dreams (GD) manteniendo la configuración recomendada de EM or ATK% · Cryo DMG Bonus · CRIT Rate or CRIT DMG. Es más fácil evaluar el cambio sin modificar a la vez el equipo y los tiempos de las habilidades.
Opciones de equipo
46 opciones
Empieza con equipo que puedas conseguir. Son alternativas, no piezas para usar juntas. El refinamiento, el conjunto y las restricciones cambian el resultado.
Conjuntos de artefactos
4pc Gilded Dreams (GD)Reverse Melt
4pc LavawalkerReverse Melt
4pc Unfinished ReverieReverse Melt
4pc Emblem of Severed Fate (EoSF)Reverse Melt
+13 opciones
2pc + 2pc Mixed SetsReverse Melt
4pc Blizzard Strayer (BS)Freeze / Mono Cryo
4pc Marechaussee Hunter (MH)Freeze / Mono Cryo
4pc Emblem of Severed Fate (EoSF)Freeze / Mono Cryo
4pc Noblesse ObligeFreeze / Mono Cryo
4pc Scroll of the Hero of Cinder City (Scroll)Freeze / Mono Cryo
2pc + 2pc Mixed SetsFreeze / Mono Cryo
4pc Archaic Petra (AP)Freeze / Mono Cryo
4pc Noblesse ObligeSupport
4pc Scroll of the Hero of Cinder City (Scroll)Support
4pc Emblem of Severed Fate (EoSF)Support
2pc + 2pc Mixed SetsSupport
4pc Archaic Petra (AP)Support
Armas
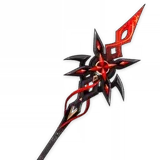
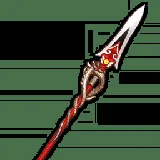
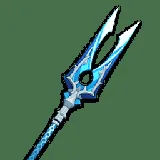
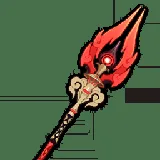
5★ Staff of the Scarlet SandsReverse Melt
5★ 608 Base ATK Polearms with CRIT secondary statsReverse Melt
5★ Calamity QuellerReverse Melt
4★ Ballad of the FjordsReverse Melt
+25 opciones
4★ DeathmatchReverse Melt
4★ Wavebreaker’s FinReverse Melt
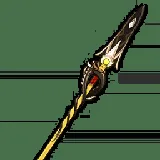
5★ Primordial Jade Winged-SpearReverse Melt
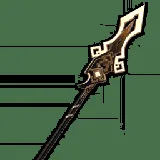
5★ Crimson Moon’s SemblanceReverse Melt
4★ Dragon’s BaneReverse Melt
4★ Missive WindspearReverse Melt
4★ “The Catch”Reverse Melt
5★ Fractured Halo, Staff of Homa, Symphonist of ScentsFreeze / Mono Cryo
5★ Calamity QuellerFreeze / Mono Cryo
4★ Wavebreaker’s FinFreeze / Mono Cryo
4★ DeathmatchFreeze / Mono Cryo
5★ CRIT Rate PolerarmsFreeze / Mono Cryo
4★ Lithic SpearFreeze / Mono Cryo
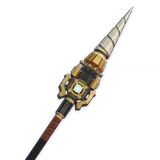
4★ Prospector’s DrillFreeze / Mono Cryo
5★ Vortex VanquisherFreeze / Mono Cryo
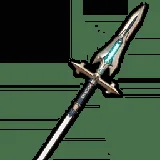
4★ Favonius LanceFreeze / Mono Cryo
4★ “The Catch”Freeze / Mono Cryo
4★ Blackcliff PoleFreeze / Mono Cryo
4★ Crescent PikeFreeze / Mono Cryo
4★ Favonius LanceSupport
5★ Staff of the Scarlet SandsSupport
4★ DeathmatchSupport
5★ Primordial Jade Winged-SpearSupport
5★ Engulfing LightningSupport
4★ “The Catch”Support
Estadísticas principales
Usa las recomendaciones por ranura para crear una configuración funcional. Cuando hay varias opciones, elige la que resuelva una carencia de tu equipo.
SandsEM or ATK%Reverse Melt
GobletCryo DMG BonusReverse Melt
CircletCRIT Rate or CRIT DMGReverse Melt
SandsATK% or ERFreeze / Mono Cryo
GobletCryo DMG BonusFreeze / Mono Cryo
CircletCRIT DMG or CRIT RateFreeze / Mono Cryo
SandsER or ATK%Support
GobletCryo DMG BonusSupport
CircletCRIT Rate or CRIT DMGSupport
Inversión y configuraciones
Practice sequence
E Q
Practice sequence
Q E
Practice sequence
E > Teammate
GACHABUILDS
Prueba tu configuración
Equilibra probabilidad y daño crítico. Un número alto aporta menos si los críticos son irregulares; compara la configuración completa.
Elige una opción, repite el combate dos veces y cambia una variable. Comprueba que la siguiente rotación empiece a tiempo y que el equipo sobreviva.