
Genshin ImpactDehya 빌드
장비 선택지 · 주요 능력치 · 팀 예시
빌드 계획Dehya의 4pc Tenacity of the Millelith 선택지를 권장 EM* / HP% · EM* / HP% · CRIT Rate (Favonius) / EM* / HP% / Healing Bonus 구성으로 비교하세요. 팀과 스킬 타이밍을 유지해야 장비 변경 효과를 판단하기 쉽습니다.
장비 선택지
36 선택지획득할 수 있는 장비부터 시작하세요. 함께 착용하는 목록이 아닌 대안입니다. 강화 단계, 세트 수와 팀 조건에 따라 결과가 달라집니다.
성유물 세트

4pc Tenacity of the MillelithOff-Field Support

4pc Scroll of the Hero of Cinder CityOff-Field Support

4pc InstructorOff-Field Support

4pc Silken Moon’s SerenadeOff-Field Support
+12 선택지

4pc Deepwood MemoriesOff-Field Support

4pc Flower of Paradise LostBurgeon

4pc Gilded DreamsBurgeon
4pc Deepwood MemoriesBurgeon

2pc Mixed SetsBurgeon
4pc Silken Moon’s SerenadeBurgeon

4pc Marechaussee HunterOn-Field DPS

4pc Vourukasha’s GlowOn-Field DPS

4pc Emblem of Severed FateOn-Field DPS

4pc Night of the Sky’s UnveilingOn-Field DPS

4pc Unfinished ReverieOn-Field DPS

4pc Long Night’s OathOn-Field DPS
무기

4★ Sacrificial Greatsword (R5)Off-Field Support

4★ Favonius GreatswordOff-Field Support

4★ Makhaira AquamarineOff-Field Support

4★ Portable Power Saw , The BellOff-Field Support
+16 선택지
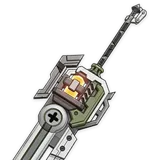
4★ Master KeyBurgeon

4★ Mailed FlowerBurgeon
4★ Makhaira AquamarineBurgeon
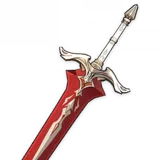
3★ Bloodtainted GreatswordBurgeon

4★ RainslasherBurgeon

5★ Beacon of the Reed SeaOn-Field DPS

5★ Verdict , Redhorn Stonethresher , A Thousand Blazing SunsOn-Field DPS

4★ AkuoumaruOn-Field DPS

4★ Rainslasher , Mailed FlowerOn-Field DPS

4★ Serpent Spine , Ultimate Overlord’s Mega Magic Sword , Talking Stick , Blackcliff SlasherOn-Field DPS
4★ Master KeyOn-Field DPS

5★ Wolf’s Gravestone , Skyward Pride , The Unforged , Fang of the Mountain KingOn-Field DPS
4★ Favonius GreatswordOn-Field DPS

4★ Katsuragikiri Nagamasa , Luxurious Sea-Lord , Tidal ShadowOn-Field DPS
4★ Portable Power Saw , The BellOn-Field DPS

4★ Fruitful HookOn-Field DPS
주요 능력치
부위별 권장 능력치로 작동하는 빌드를 만드세요. 여러 선택지 중 현재 팀의 부족한 부분을 보완하는 것을 고르세요.
SandsEM* / HP%Off-Field Support
GobletEM* / HP%Off-Field Support
CircletCRIT Rate (Favonius) / EM* / HP% / Healing BonusOff-Field Support
SandsElemental MasteryBurgeon
GobletElemental MasteryBurgeon
CircletElemental MasteryBurgeon
SandsER / EM / ATK% / HP% (C1)On-Field DPS
GobletPyro DMG BonusOn-Field DPS
CircletCRIT Rate / CRIT DMGOn-Field DPS
스킬
스킬 이름과 해금 정보를 현재 형태와 비교하세요. 레벨, 강화와 변형에 따라 스킬이 달라집니다.

Sandstorm Assault
유형 / 해금: Normal Attack · Level 10
표시된 능력치
- 1-Hit DMG 122.8%
- 2-Hit DMG 122.0%
- 3-Hit DMG 151.5%
- 4-Hit DMG 188.4%
- Charged Attack Cyclic DMG 111.3%
- Charged Attack Final DMG 201%
- Charged Attack Stamina Cost 40.0/s
- Max Duration 5.0s
- Plunge DMG 147.4%
- Low/High Plunge DMG 295%/368%

Molten Inferno
유형 / 해금: Elemental Skill · Level 10
표시된 능력치
- Indomitable Flame DMG 203.2%
- Ranging Flame DMG 239.0%
- Field DMG 108.4% ATK+1.86% Max HP
- Mitigation 50%
- Redmane's Blood Maximum 200% Max HP
- Field Duration 12.0s
- CD 20.0s

Leonine Bite
유형 / 해금: Elemental Burst · Level 10
표시된 능력치
- Flame-Mane's Fist DMG 177.7% ATK+3.05% Max HP
- Incineration Drive DMG 250.7% ATK+4.30% Max HP
- Duration 4.0s
- CD 18.0s
- Energy Cost 70
표시된 능력치
Level 90/90
Base HP 15,675
Base ATK 265
Base DEF 628
HP 28.8%
투자 및 설정
Practice sequence
C0-C5: E > Team > Q N10 > Team > E C6: E > Team > Q N15–16 > Team > E
Practice sequence
Chevreuse Overloaded
Practice sequence
Chevreuse Overloaded (with Raiden)
팀 예시
팀 예시는 출발점입니다. 보유 캐릭터와 자원 순환을 확인하세요. 한 명을 바꾸면 버프 타이밍과 생존 지원도 달라집니다.
팀 예시 1 · 팀 예시 2 · 팀 예시 3 · 팀 예시 4 · 팀 예시 5 · 팀 예시 6 · 팀 예시 7 · 팀 예시 8 · GACHABUILDS설정 테스트
치명타 확률과 피해를 균형 있게 맞추세요. 한 장비가 아닌 전체 빌드를 비교하세요.
캐릭터가 방어 능력치에 비례한다면 권장 수치를 유지하세요. 공격적인 대안이 생존력과 기여도를 낮출 수 있습니다.
선택지 하나로 전투를 반복하고 한 변수만 바꾸세요. 다음 순환 시작 시간과 팀 생존 여부를 확인하세요.
확인 · 2026-10-13