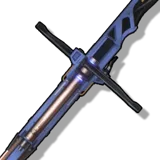
For Jingran, compare Thousandfold Deliverance while keeping the recommended CRIT DMG / HP% · CRIT DMG / HP% · HP% setup fixed. A weapon or set change is easier to judge when you do not also change the team and skill timing.
Equipment options
14 options
Start with equipment you can actually obtain. These are alternative recommendations, not pieces to equip together. Refinement, set size and team restrictions change the result.
Weapons
Thousandfold Deliverance(R 1 )
Thunderflare Dominion(R 1 )
Verdant Summit(R 1 )
Wildfire Mark(R 1 )
+9 options
Radiance Cleaver(R 1 )
Aureate Zenith(R 5 )
Ages of Harvest(R 1 )
Kumokiri(R 1 )
Autumntrace(R 5 )
Lustrous Razor(R 1 )
Helios Cleaver(R 5 )
Waning Redshift(R 5 )
Meditations on Mercy(R 5 )
Echo sets
Lamp of Nether Road
Main stats
Use the slot recommendations to make your first functional setup. When several stats are listed, choose the one that fills the gap in your current team rather than mixing every option.
4 costCRIT DMG / HP%
4 costCRIT DMG / HP%
1 costHP%
1 costHP%
1 costHP%
Substats
Energy Regen (Until Satisfied) > HP (Until 50000) > CRIT Rate = CRIT DMG > Heavy DMG% > ATK% > ATK
Skill priority
Follow the skill order below for your next upgrade. Compare one rank at a time, and keep the same team and enemy so equipment changes do not hide the result.
Check ability names and unlock information against your current game form. Level, upgrades and variants can change skills.
Ed
Edge of Life and Death
Ma
Malevolent Encounter
Bu
Burial of Thousand Souls
Up
Upstream Along Santu
Tu
Tune Break: Broadblade
Ha
Hark the Dust
Tr
Trace the Vestige
Qu
Question the Tombs
Ri
Rising Fortune and Ebbing Evil
Yi
Yin and Yang in Harmony, the Ultimate Law of Being
A
A Solitary Lantern, Across Lands Shade-Trodden
Wo
World's Course Shifts, Each to Their Rightful Paths
Wh
Where Reality Meets Illusion, Where Living Meet Dead
En
Ends Return to Beginnings, Truth of Life Laid Bare
As
As Favors and Feuds Fade, New Stories Await
GACHABUILDS
Test your setup
Balance critical rate with critical damage. A large damage number is less useful when critical hits are inconsistent; evaluate the complete setup rather than a single item.
Keep the recommended defensive stat when the character scales with it. An offensive-looking replacement can reduce both survivability and the contribution expected from this setup.
Choose one option, run the same encounter twice, and change one variable. Record whether the next rotation starts on time and whether the team survives without losing its damage window.